

One tool every bassoonist should have in their kit—regardless of whether they are making reeds—is a reamer. Reamers remove cane from the inside of the reed to ensure a snug and proper fit on the bocal. Every bocal will have small variances in the taper and opening at the end, so regardless of if you’re buying reeds from a professional or getting them from your local music store, it is likely that you will need to ream some of your reeds to make them work with your instrument.
Nothing is more annoying than having an improperly fitting reed shift while you’re playing (or worse, falling off completely).
When Should I Ream a Bassoon Reed?
A well-fitting bassoon reed should sit somewhere between the middle and bottom wire (6-10mm or 5/16” ) on the bocal. It should fit snuggly on the bocal and not move around while playing.
If a reed is twisting on the bocal or falls off while playing, the reed likely needs to be reamed. Do not, however, overlook playing position. Watch yourself play in a mirror and ensure that you are relaxed and not tilting your head or moving excessively while playing. Also double-check the cork on your bocal. Cork compresses over time your bocal may become loose. Bocals can be re-corked by your local bassoon repair technician.
A poorly fitted reed may also rock up and down or side to side. If this is happening, the taper of your reed is narrowing too quickly. The butt of the reed is often visually loose but cannot be pushed on further because it’s too narrow further inside the reed.
Ill-fitting reeds will cause air leaks that impact tone and intonation. If the reed shifts while playing, you might find yourself in an awkward position which can cause pain and injury over time.
Spiral versus Diamond Coated Reamers
There are two main types of reamers, spiral and diamond coated. Which one you use depends on the situation. In general, spiral reamers have the ability to take out a significant amount of wood very quickly, while diamond-coated reamers are a little more precise and less harsh on the inside of the reed.
Spiral Reamers
- Have a spiral tip, and look like a drill bit
- Take out the most amount of cane
- Only use on dry reeds
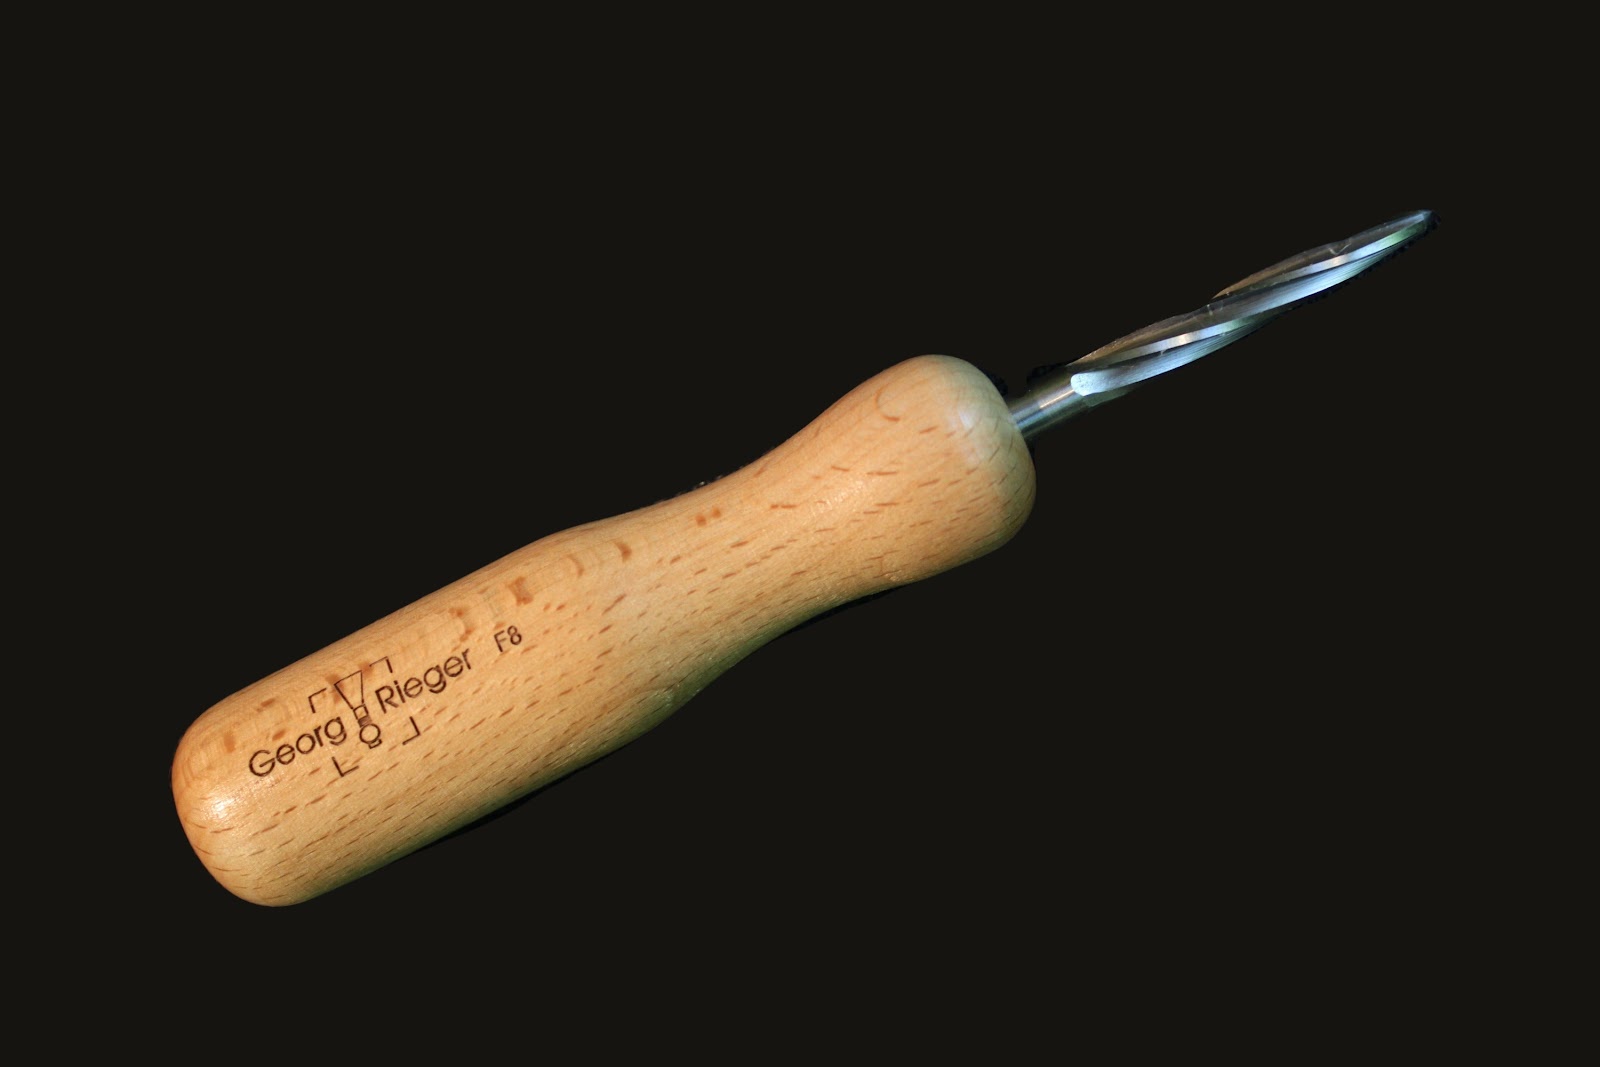
Purchase the Rieger Spiral Reamer HERE.
Diamond Coated
- Looks similar to a regular mandrel, except it is coarse all around
- Great for small adjustments and smoothing out the inside after using a spiral reamer
- Safe to use on soaked reeds
- Use if a reed fits when dry but not soaked
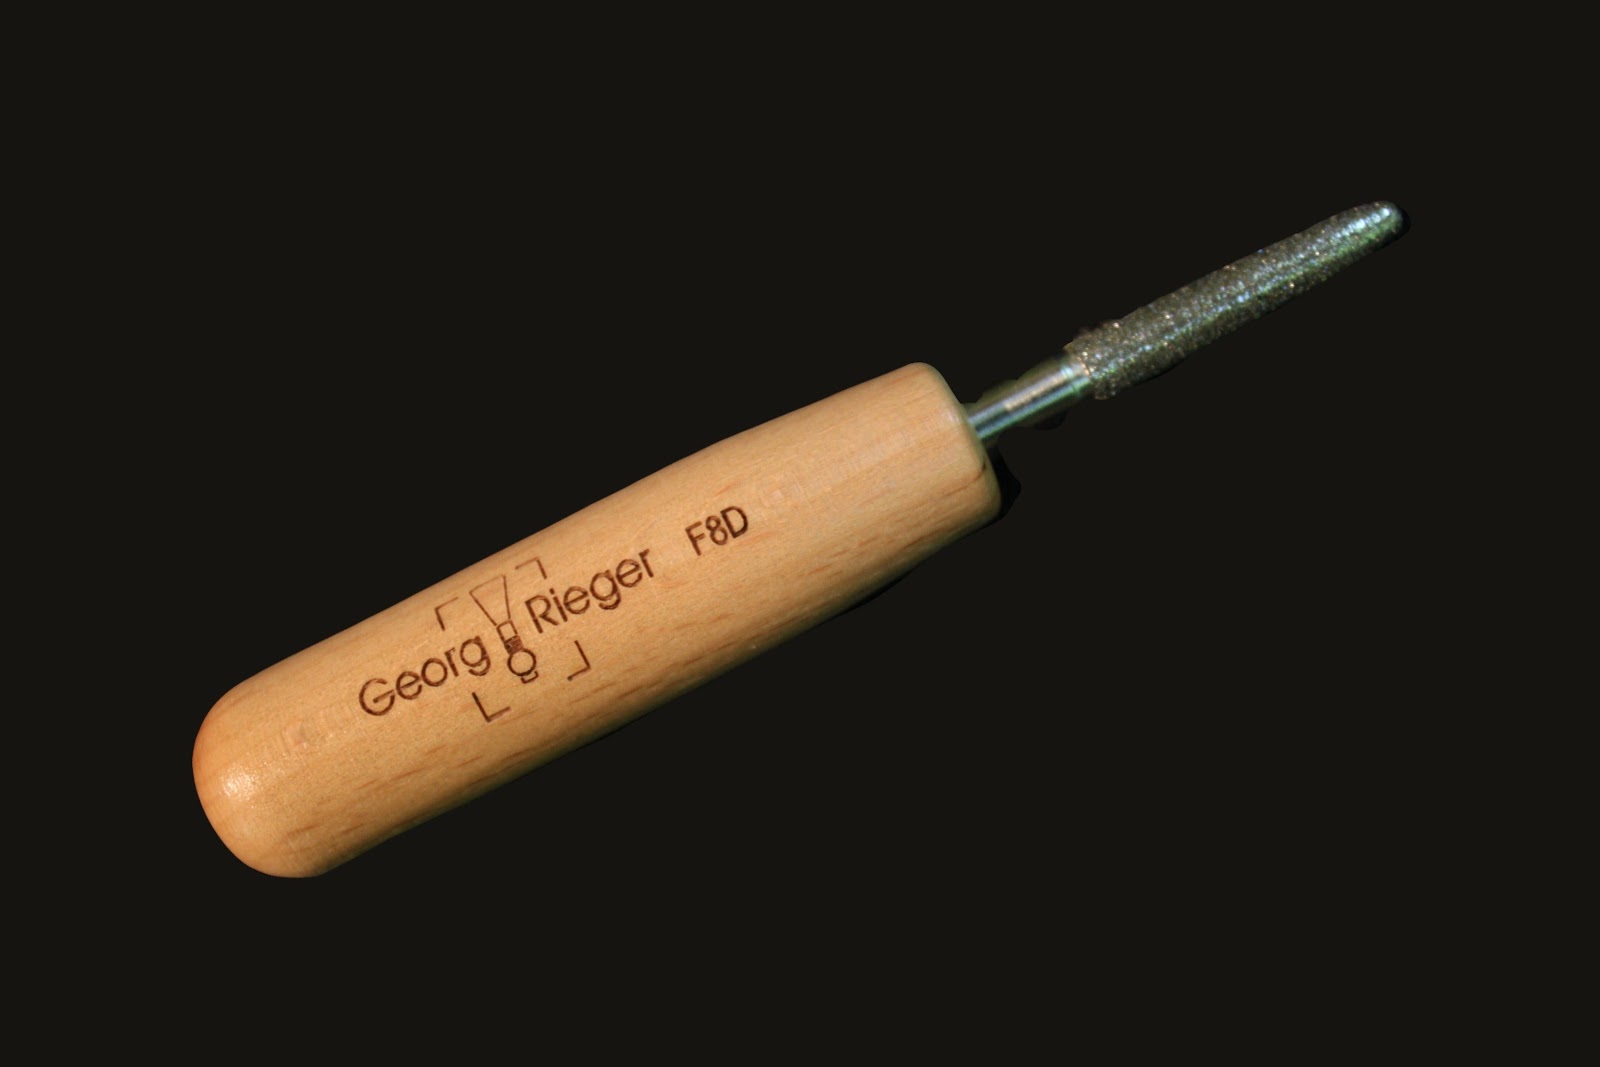
Purchase the Rieger Diamond Coated Reamer HERE.
Reaming Technique
The key to reaming (as with many adjustment techniques) is to work slowly and test often. You should always start reaming when the reed is DRY. Begin turning the reamer as you ease it onto the reed. Do not jam it in and begin turning. After a couple of turns, check the fit on your bocal. Continue working in small increments (three to four half turns max) until the reed sits properly on the bocal.
Next, soak the entire reed (not just the blade) and test the fit on your bocal. If it has changed, you can ream while the reed is wet, but be extremely careful. Cane becomes softer when wet, so work in even smaller increments and use a diamond reamer if one is available.
Remember, you can take cane off, but you can’t put it back on.
If you have access to both a spiral and diamond-coated reamer, start with the spiral reamer. Once you are close to the desired fit, finish off with the diamond-coated reamer, which will take the last little bit you need off while simultaneously smoothing out the inside.
Pro Tip: To keep your reamer in tip-top shape, clean it out with an old toothbrush or pipe cleaner after use.
Product Insight: The Fox Combination Mandrel/Reamer is a great entry-level reamer with the added benefit that it doubles as a mandrel by swapping out the tip. PURCHASE HERE.

Using a Stopper
Having a stopper on your reamer ensures consistency and prevents you from reaming too much. To figure out where to place the stopper on your mandrel:
- Find an old reed that fits well on your bocal.
- Insert the reamer into the well-fitting reed and make note of how far down the reamer it sits.
- Place the stopper at the point that the well-fitting reed stops on the reamer. This will stop you from taking out too much cane from the inside of the reed.
If you don’t have a stopper (and don’t mind marking up your tools), you can mark the place where you should always stop reaming with a sharpie.
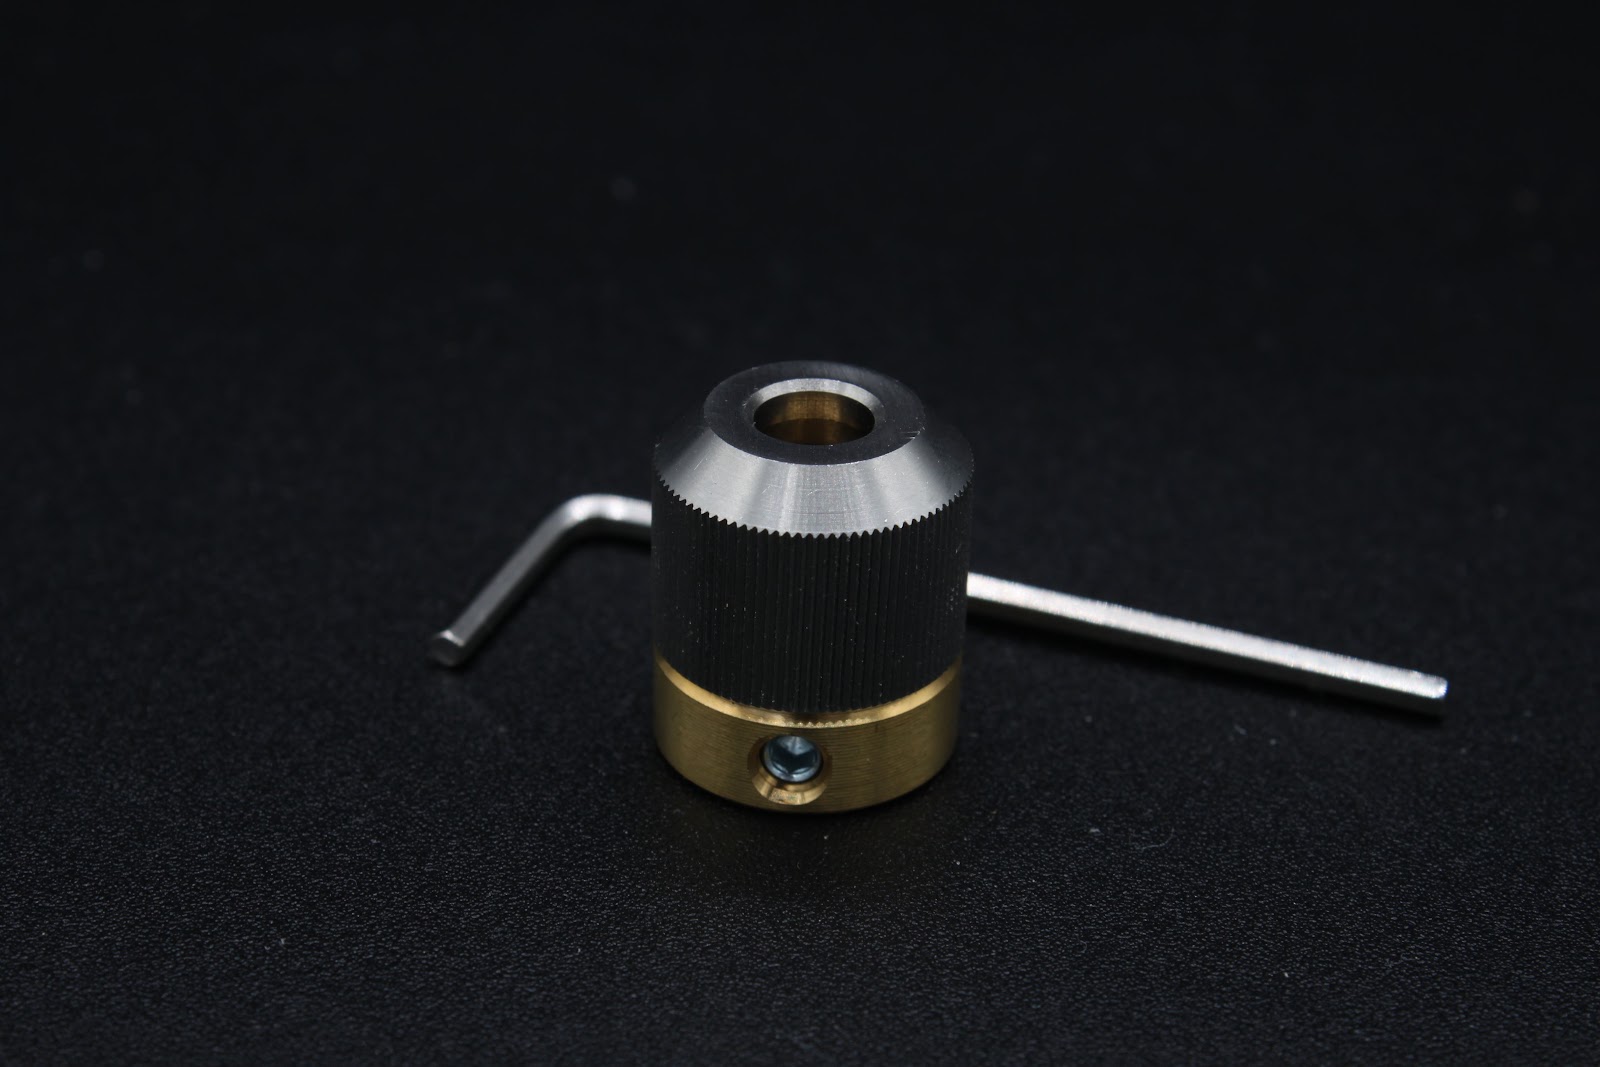
Product Insight: The Reeds ’n Stuff ejector ring helps you avoid twisting the reed off the mandrel (which can slip the blades) while also acting as a depth stop. Once the ejector ring’s position is set on the reamer, turn the silver portion to gently push the reed off the reamer. PURCHASE HERE.
How to Avoid Reaming Altogether
If you are buying reeds, there may not be much you can do. If a reed by a particular brand or reed maker doesn’t fit well, chances are they will all be like that.
If you are making your own reeds, pay close attention during the forming process and how far you are pushing the reed onto the forming mandrel. You can also put a mark on your mandrel to remind you how far to go when forming. If you reach the marking and notice the cane isn’t coming together, it is possible that the shape of cane you are using is too narrow for your bocal. Barton Cane is an excellent source to find the dimensions of different shapes of cane.
Summary
If you made it this far, congrats, you probably didn’t think someone could go on this long about hollowing out a piece of wood (I didn’t either when I started writing this). Here at Reed Supplies Canada, we are always learning and love connecting with our readers. If you have comments, tips, and/or questions, let us know in the comment section below or reach out through the Contact Us page.